Monday, July 4, 2011

July 4th, 2011, ORSF #50

We spent the long 4th of July weekend at Otter River State Forest (our favorite) on site 50.  We never stayed on this site before, at least not in our adult camping lives.  It was really nice and a big site.  The bit of rain we had wasn't too bad and nothing really was in the path of water.  The solar panel got enough sun to keep the battery close enough to full.  One empty tank of propane and I'll need to restock things after this trip.....writing this here as a bit of a reminder, things like forks and paper towels and so on.  Mike went out early and is staying one extra night so we packed up a few things and I brought them home as I have to work tomorrow :(  Mike picked up a new dutch oven and made homemade baked beans, yummmm!  Bad luck fishing was still better than sitting at home or work, as always.  A fairly ordinary trip but still wanted to mention it :)  We'll go again in a couple weekends, but no set plans today.  Next planned trip will be the Rainbow Girls trip next month.  We're second guessing a host trip this year because another family is coming in when we wanted to do it, but that's our own fault for procrastinating on final paperwork and plans.  Until the next trip, happy camping!
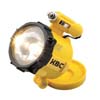
PS.  My little homemade light below is too dim, although it is cute as hell.  I'm thinking of wiring up my own LED with a bulb from Radio Shack.  Stay tuned for V.1.1!

Monday, June 27, 2011

"Chandelier v1.0"

Parts and pieces laid out.

I had this idea for a movable, more direct and functional light for the camper that was also 12 volt (most of our camping is dry) and "cute".  My idea was to take a work light meant for emergency tire changes or working under the hood on the side of the road and add a cheap little lamp shade from the craft store to give it that "I'm not a work light" look.  So I picked up this cheap little work light from eBay (there is still 364 of them left, lol) and then I bought a little shade meant for the candle lights that people put in their windows at Christmas time (using a coupon it came to $1.40).  I liked this light because it had the longer, straight cord at 10 feet.  It can reach anywhere in the camper and my 12 volt plug is pretty much in the center of the camper.  I also liked it because it was really small.  I was also looking at this one at Walmart for $6, but it is much bulkier (can't find the Walmart link at this moment).  But it has a retractable cord that is maybe 6' or 8'.  But again bulkier.  The only reason I may still try something out with it is because I am sure it is much brighter than this little one I choose over it.  So all I did was open up the wire of the shade that goes over the bulb a bit then slid the cord into an already opened up piece of a clip that went around that.  I used a suction cup on the window itself, my walls are textured even though a command hook will work if I decide on a permanent spot on the wall that folds in first. I have one up already in the  center for a little sign I hang up when camping.  Here are a couple pictures.  I'll call this Chandler v1.0.  I am happy with the concept, execution and the looks of this but I just wish it was a bit brighter.  The clear plastic is just glued to the red top over a bulb soldered in, maybe I'll drag Mike over to radio shack to help me find one just a tad brighter.  Either way for a total cost of $5.65 I am very happy with my little light and will give it a test run this coming weekend at Otter River.
My movable 12 volt Light

Sunday, June 26, 2011

Burlingame SP, Charlstown RI # 416

Mike and I spent the weekend in Rhode Island at Burlingame State Park at site 416.  This place is huge!  My dad says this is the first place I ever camped as a baby.  It's pretty much a village with something like 700 or 800 sites.  The ones away from the water are best because they are spread out and bigger.  I don't like being right on top of other people while camping.  If you don't mind that then a site close to the water may be okay for you.  The lake was perfect.  Mike caught one fish there and one in another we found roaming around.  It'd be great for the canoe if we brought it.  They rent them out too.  We didn't feel like working so hard this weekend though.  We saw two other Aliners.  One was maybe an 03 or 04.  A couple of ladies were camping in it.  They came in right after us and slowed to look at ours but when we went by and said hi they didn't seem to into being social so we went on our way.  The other one we saw was an 09 Classic and it was a couple camping with their grandson.  He was pretty happy to tell us his story and listen to ours.  I guess sometimes you get the vibe that someone wants to tell or not.  We always want to tell, lol.  We don't mind show and tell at all.  Everything about this campground was great except the showers.  They were pay which was fine but there was no way to adjust the temperature or to shut it off when you were done.  Thankfully I only put in 50 cents and I was well done and gone before it shut off.  It never warmed up to anything that resembled warm in any way.  The people in this part of the state/country seemed pretty grumpy and short too, but we still enjoyed ourselves.
We'll be going back out in three days.  Well Mike, Kenzie and the dogs will go out Thursday and I'll be out with Taylor Friday after we're done with work.  We'll be at Otter River site #50.


Tuesday, June 21, 2011

Solar Panel continued (Plug details)


This post contains a bit more detail about the solar panel setup and connector.  Search the blog for keyword solar for other details.

Solar Panel --->2-Pin Connector--->Controller--->Battery.

Two Pin Connector From Radio Shack

2-Pin Plug Opened, Plug in only one way.

Small controller that came with solar panel (3 amp, max output of the solar panel is 1.68 amp).

Alligator clips on battery from controller.

Simple power gauge.

Line in from the solar panel (to the connector).  Plug is before the controller.

Cable from panel through power opening.

Front view.
I'd like to either mount the panel to a multi-directional pole on the front tongue or add an edge over the bubble so the panel sits a bit more secured.  The 2 pin connector was bought at Radio Shack for a couple dollars.  The wires off the panel were bare and easy to crimp into the connector.  The connection from the controller was easy because it came with alligator clips.

eta on 6/30/2011:  I came across a website today about RV mods and it had a really good solar write up.  It has a lot of the information I found all over the place in one place.  Granted the install is more complex than mine and it's meant for a larger camper with a full roof and permanent set up but the general info and background is very useful if you're researching for your own project.

Monday, June 20, 2011

Drawer Stop


 This mod was done a couple months ago and I kept forgetting to post an update and I'm not sure why because this is a pretty valuable one, especially for those who don't like picking up the contents of a spilled drawer or having damaged stuff from a flying drawer.  Before this mod we would try to remember to take the drawer out and put it on the floor before traveling, we have forgotten more than once.  We'd also try to pack up around it so it didn't have the opportunity to fall out, that didn't always work well

either.  So after replacing the locks on the access panels (lost keys) we looked to see if there were similar "locks" but as a thumb turn rather than a key lock.  A key lock would've done the trick too, but I didn't want to have to worry about losing the key to something else again.  We found such a thing at Lowes.  
Mike notched out enough room for the stop to turn and hit the back of the cabinet.  It's perfect.  I know that most do not have household oak cabinets in their campers so if you're doing this to your camper you either may not have to notch out anything or you may have to add some thickness or something for it to catch on and where it catches may need to be reinforced on a thinner camper cabinet.  This, along with the bed lift is on my list of favorite add ons.  


Looking Top Down

From Inside, notched out.  Catches on the cabinet facing.

Friday, June 17, 2011

Tiny House Blog Likes Us

Yesterday we were featured on the Tiny House Blog. Although the Aliner is not really a tiny house it's related :) I read the blog a lot, daily usually. The Aliner is as close to living in a tiny house as we get. With two kids, two dogs, 2.5 cats (the half cat adopted us when the neighbors up the street left their foreclosed home and him behind) plus the two of us. Someday a simpler life will be the way, but for now the chaos is awesome. But the Tiny House Blog generates a lot of creative ideas, methods and choices for not only a simpler life a better one. Most of us only need or use a fraction of what we have, it is the American thing to do after all. And honestly the more we pair down or the more we camp in our small, simple, contained unit the more content I am. Don't get me wrong I make sure I have what I want but think about how much easier less is in the long run. The KISS method is making it into my top 5 a lot more often than it used to. And one of our goals this year has been to purge and re-access what we really need in our space(s). Here is the link to the write up on the Tiny House Blog but take some time to look around at the rest of this blog and become inspired by the less is more frame of mind.

Thursday, June 9, 2011

Aliner Project Mobile


Now you can read this blog on your mobile device!
Enjoy!

Wednesday, June 1, 2011

Memorial Day Weekend 2011, ORSF #28


Memorial Day weekend, from Thursday the 26th until June 1st. We had a quick thunderstorm on Saturday and a bit of a shower Monday morning, otherwise it was a gorgeous, sunfilled, warm weekend. The new LED lights and solar panel did great. The battery kept a full charge (at least according to the simple gauge mounted inside, forgot the digital voltmeter at home). I am sure the LEDs had a lot to do with it too. The LEDs were a bit dimmer and we may need to add a reading light but that shouldn’t be too hard and well add another LED. I think even some of those solar powered landscape lights would do the trick. A lot of them are pretty nice. Or an LED strip, people seem to be outfitting their cars with them, it would work well in the camper.

Mike went out on Thursday and I came out and helped him finish setting up after work. My dad came up for the afternoon too, so that was nice. I was back out Friday after the kids went to school and we went to Mackenzie’s Memorial Day function at school. Then they didn’t come out until after her school dance that night. Mike was in his cast and sling all weekend but he still did some cooking and got some fishing in. It had to be the quietest Memorial weekend ever at Otter River, it was wonderful. I guess the party animals found somewhere else to go other than state parks. I wish I could have stayed longer but the girls and I went home Monday evening and Mike stayed out until today (the first). He had his cast removed yesterday and is really sore so I am going to leave work early to pack up whatever the girls and I didn’t pack up the other day before we left. He kept Deogee with him and we have Haily. It’s pretty pathetic how much they miss each other, even though they saw each other yesterday when Mike came home for his doctors appointment. Mackenzie called me this morning to let me know Haily was acting funny again, depressed.

We are planning on host camping in August, then we have the Rainbow girls for a weekend at camp too so we will probably do both trips back to back so we’ll just move from the host site to the group site. I’m hoping Mike and I can get a few weekend trips in too. I’m gonna end up using most of my vacation in August for the host trip, but that’s okay, I’ll work when it’s snowing out this winter!

Monday, May 9, 2011

Solar Panel

Here is the solar panel that I picked up on Amazon. I don't know exactly how much we're getting out of it but checking it with a digital volt meter it is recovering fast in the full sun in my driveway. When I checked it with the analog gauge mounted in the camper it was under 12v. By the time I went in and got the digital meter it was over 12v, 12.30 to be exact. It steadily increased about 0.01v every few seconds. We let it get up around 12.5v then ran the pump for a few seconds and it dropped back down to 12.3 but was back up quickly.
Mike put a two prong male female quick disconnect so we can take it off for travel.
I'm happy with the purchase. I'll give more details after a camping trip. Unfortunately we camp in the shaded woods so it won't pull as much power.

  • Power (Pmax) : 30W
  • Maximum power voltage ( Vpm ) : 17.5V ;Maximum Power Current: 1.68A
  • Cable lengths : 12.5'
  • Open circuit voltage ( Voc ) : 21.95V
  • Charge controller prevents overcharging of 12-volt batteries

Friday, May 6, 2011

LED Bulb Replacement


Thanks to free two day shipping from Amazon the LEDs and solar panel came today. I will give an update on the LEDs for now because thats quick and ea
sy. I ordered two of these. Details are as follows:
  • Bulb Type:BA15S Base (Single Contact)
  • 93B2 1156 1141 Bulb Replacement with LED
  • Lumen:80 Lumen Color Temperature:Warm White 3100K
  • Working Voltage:10 - 16 V DC, Power:1.44 Watt
  • LED:15 LEDs, SMD3528
They were packaged very well from LED Wholesalers.


The LEDs are slightly taller and thinner and fit just fine. These are "water proof". I just thought it was a better design. The reviews also noted that in other LEDs that they had purchased they had broken the LEDs off the base putting it into the socket and the glass on these solved that issue. These are the only ones I bought so I don't really know otherwise. I'm very happy with how these feel though.
Old incandescent bulb:
Incandescent covered:
LED:
LED covered.
In the daylight they look to give off about the same light, the LED might even be slightly brighter. These are the 3000k warm led's and I think they are just a tad white and not as harsh as I thought they might be. I can only imagine the 6000k are pretty harsh. I haven't seen them in the dark yet. I'll try to check them out later. I am very happy with them in the daylight though. I was afraid they wouldn't be bright enough at only 80 lumens but they are perfect. These should only use about 1/24th of the power that the old bulbs did too!!

Wednesday, May 4, 2011

Solar Panel and LED Bulbs.


With my 10 year anniversary gift card from work I am going to pick up a small solar panel and some led light bulbs for the camper. Things I would like but just can't see spending the household money on. I looked at clothes and jewelery but I keep coming back to these things, sad, I know, lol.
Here is the solar panel I have decided on at Amazon.com. It is a 30 watt mono-crystalline panel with a power controller (which probably isn't needed but it's only an extra $12). From what I learned in my research mono-crystalline cells are the oldest technology but they are also the smallest and most efficient. Poly-crystalline is a close second and then the thin film technology is called amorphous which I didn't spend too much time on because they are the largest and least effiecient, supposedly the least expensive but the price differences where not really worth noting, at least not on Amazon. I am going through Amazon because of the gift card, but honestly it's hard to beat the prices and no one can touch the free shipping. I asked a lot of questions on the Aliner Yahoo group list and between them and google I am pretty happy with this choice and I'll place the order later today.
To help out the drain on the battery when dry camping I am going to put LED bulbs in the two light fixtures in the camper. They both are single bulbs, old style 1141. This style isn't as easy to find the LED bulbs in, so they are more expensive then the common wedge types used in current models. It wouldn't cost more than $10 probably to update ours, but there isn't anything wrong with ours so why bother. I settled on these small bulbs because they had a good review. I was looking at brighter bulbs but honestly I hate bright white light. I made sure the ones I picked where the warmer light (3000-3100K not the 6000-6100K).
I'll post update once the order comes in and we get everything put in. I'm hoping it comes before Memorial Day as we're spending the weekend at our favorite spot, Otter River State Forest which does not have any hook ups....not that we wouldn't make it the weekend on a single charge, but it would be nice to try it out!

Tuesday, May 3, 2011

Logo's Complete!


Mike suggested the brown stripe, picked it up locally and applied it. We think it really pulls it together. We had an extra logo because the vendor had made a mistake so Mike used it on the rear and added the green stripe with a concave cut near the wording. It's raised up so it sits over the lights and spare. Like a new camper, love it! Well worth all the hours agonizing over the right logos, fonts and colors as well as all the picking and cleaning up from the old logos.

Sunday, May 1, 2011

Green Stripes Added


Today we applied the green stripe on both long sides. We're thinking of not adding anything to the front (not sure yet, suggestions welcome!) on the back we're going to put the wording, Aliner LX and a variation on the green stripe. We're also going to add a small one inch stripe under it all. We were up in the air about the brown stripe but now that the thicker green stripe is on we think it would really tie it in with the wording and all.

Friday, April 29, 2011

Logo Removal Day 3 and New Logos Applied!

The last of the old logos and stripes were removed today and the new cameos and wording applied! We still need to add the 4" solid green stripe and we are thinking of adding a 1" solid brown stripe under it (already have the green). We spent a lot of time making sure the camper was very clean and free of any oils before applying the new logos. It was nerve racking because there was a bit of a breeze but once again Mike showed his expertise.

Here it is all clean and naked:


The application:

Close up:
Other side:
Curb side:
Road side:
I am beyond happy with this! Source of the logos is signnetwork.net. It is a small business in Canada but shipping is very quick. There was a mistake with my first shipment and she corrected it immediately and we had the replacement in just a few days. We'll add more pictures once the stripes are added.

Tuesday, April 26, 2011

Myrtle Beach, 2011


We took the Aliner on it's first long trip since we've had it and redone it. It did well thanks to new tires (see previous post). We were there a week, this year it was also their Spring break, usually it's not so there were a lot more younger families. We met another couple with a 2000 or 2001 (I can't remember) Aliner. They camped with their two younger children and small dogs, God bless them! Their camper was in great shape except the floor was going soft. They asked us to check it out and there was some discoloration near the door and in one of the baggage areas (the other baggage area had been fixed by the previous owner). We told them about the floor petifier DIY on the AOC site and pointed them toward our blog to see how we dealt with it and so they could see our case was the extreme.
Here is a snapshot of the Aliner set up in the be
autiful green forest of Myrtle Beach State Park.


Winter Updates


Over the winter we took care of a few things on the to do list. We installed 80# shocks under the bed and they make life a lot easier. Maybe we could have gone with 100#, if there is much on the bed it will close but it is nowhere as difficult as it was to lift and keep open. If it is just the bed, cover and linens it stays up just fine and I am quite happy with it. Mike did this work by himself and surprised me with it when I got home, such a sweetie :)
And before we could take a long trip like Myrtle Beach we had
to get new tires. The tires on the Aliner were mismatched, same brand different thread and we have no idea what the history was on them. They work
ed fine for short trips to Otter River but not a 1800+mile round trip. Tire research was all over the place and I found lots of info, most of it contradicting the last. So our theory was P style tires came off it and it road fine, even without matched threads, so P tires went back on it. I found pluses for ST tires and minuses but they seemed like less tire for more money. And if the sake was so they don't dry rot out then whatever, the P tires weren't that much anyway. Since putting these tires on we did take our trip to SC and the camper road just fine once we balanced the tire pressure. Initially one tire was 6psi less
than the other and the camper walked and bounced. After the adjustment it road even and smooth, even through NY city on I95! The r
ims aren't so pretty, but they are true round and happy. We went with the same size that was on it from the previous owner, 180/70 P13. We paid about $100 for two tires, balanced, replacement and road hazard insurance.
And lastly (for this update) is the entertainment center. It consist
s of a add on shelf over the seat near the door. We thought of a fold down which is typical but we decided it was a tight seat already (I cut a couple inches off the original cushion to fit the seat area so the bed would fit). Plus we only need this shelf for a rare movie off the laptop when its raining or someone is sick (this happened to me in Myrtle Beach, blah). The wood is a leftover piece from the partial wall right behind it at the door (the supporting wall for the opposing triangle wall when folded), and it is finished with
left over oak veneer edging. Mike rounded off two of the corners for me. The supports are the wire shelf frames that screw into the wall with a couple shelf arms. The laptop sits on top and the portable Bose sits under it (because the laptop speakers are not enough in the pouring rain!). I store the shelf arms under the seat and the shelf it
self fits under the cushion. I'm happy with it, it's just enough.
Currently we're working on our new logo's, removing the old, see other posts.

Logo Removal Day 2


We picked up heat gun cheap enough and well worth the $24 because it's working out much better, still far from easy or fun but at least a bit quicker. It takes an easy hand and patience. I haven't done the work with the heat gun but watching my husband I can see he working just enough heat to make it pliable and it's a fine line before it just melts. Each color has a different threshold too. The purple color has been the worse. I'm going behind him with Goo B Gone a soft scuff pad and a magic eraser to work off the dirt and left over adhesive. I am having the most success with the goo gone right on the magic eraser, just enough abrasive so to not damage the paint. It kinda creeps me out without a logo, looks weird...

Monday, April 25, 2011

Logos


We ordered some new decals from signnetwork.net and after a little going back and forth they are here so we started removing the old decal....fun, not.


Wednesday, March 9, 2011

Spring, 2011

It's been a while since I've added anything to this blog. Spring, 2011 is on its way though. We pulled the Aliner up to the active part of the driveway yesterday and there are a few things we'd like to do to it before our first trip of the year, which is next month and it's a big one. We will be going to Myrtle Beach State Park. It'll be the camper first trip out of the state. It didn't go last year because we knew we had to replace the tires before such a trip so we tented that trip. So our to do list is:
  • Replace the tires.
  • Paint the sink/heater cabinet.
  • Put a removable shelf in at the seat for the laptop.
  • Lifts for the bed.
  • Seal off opening under the bed.
  • Replace the vent that I broke over the winter :(
  • Restock.
Mike started up the heater today so while the camper was warm I went out and painted the cabinet. I had some DCR brown so that's what it is. I wish we had stained it initially, but we didn't. Mike says he can cut new wood for it, maybe down the road. I do like the DCR brown much more than the color it was. The darker brown is the same brown that I had painted the heater vent, close at least, and one of the electrically outlets. It looks better.
After:

Before: